Reclaim is better when you sign in
Become a Reclaim Member to save all your home and style inspiration.
or login here
A beginner’s guide to easy furniture upcycles
© Rachel Verney
If you’re new to the idea of using paint to breathe new life into old furniture, we’ve put together a few achievable ideas to get you started
Although the work of many professional upcyclers has now become more of an art form – using furniture as a canvas – for most of us upcycling means turning a bargain piece of worn or uninteresting furniture into something new and unique – even if it’s just a fresh coat of paint.
Start with something small – maybe a decorative picture frame, storage crate or wooden chair – and hone your skills before committing time and money to tackling a bigger project. Also, it’s quicker to repaint and start again if you make a mistake or aren’t happy with the results.
anniesloan.com
‘I recommend buying a really cheap, battered, small piece and some tester pots,’ says furniture artist and refinisher Chloe Kempster. ‘Then just have some fun, so you lose your inhibitions and gain confidence.’
It may be the less-exciting aspect of upcycling, but all professionals stress the importance of prep before you get out the paint tins, in order to achieve the best finish. This means cleaning, repairing, treating for woodworm (if necessary) and sanding.
anniesloan.com
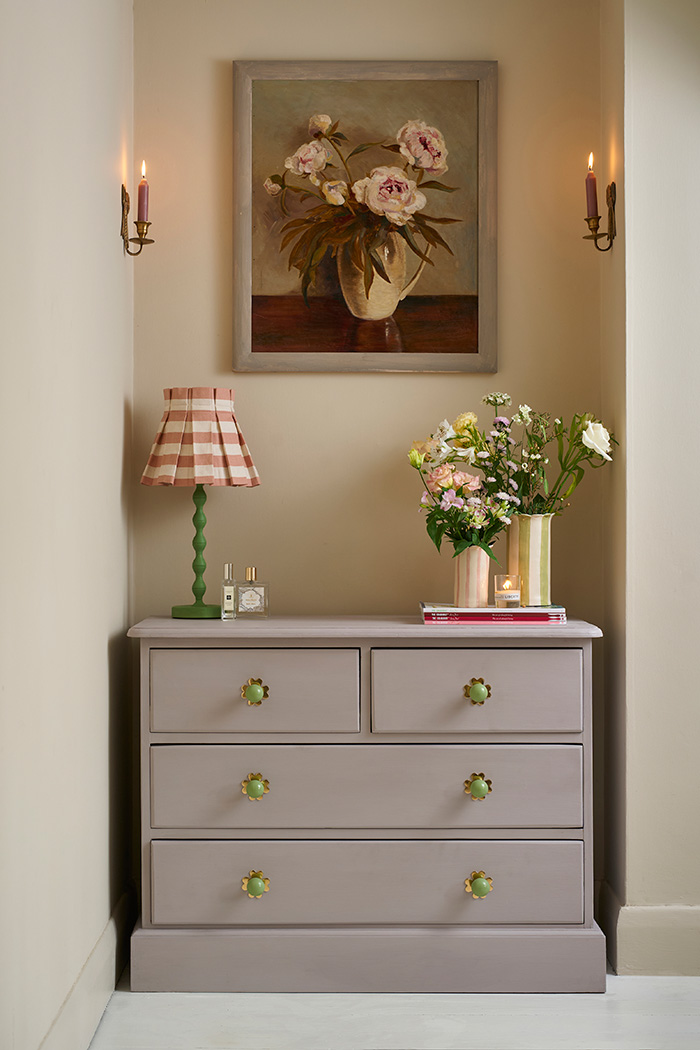
Simple style: paint and new handles
Just one shade of paint can show how transformative colour can be – and you don’t need to be artistic to get these results. This traditional Victorian chest of drawers has been given a coat of Paloma chalk paint by Annie Sloan, a lilac taupe that creates a soft warm neutral.
Never underestimate the design power of swapping out knobs or handles too – it can conjure up a brand-new look for minimal effort. Here ball knobs have been customised with pretty brass backplates from Matilda Goad.
© Tamsyn Morgans
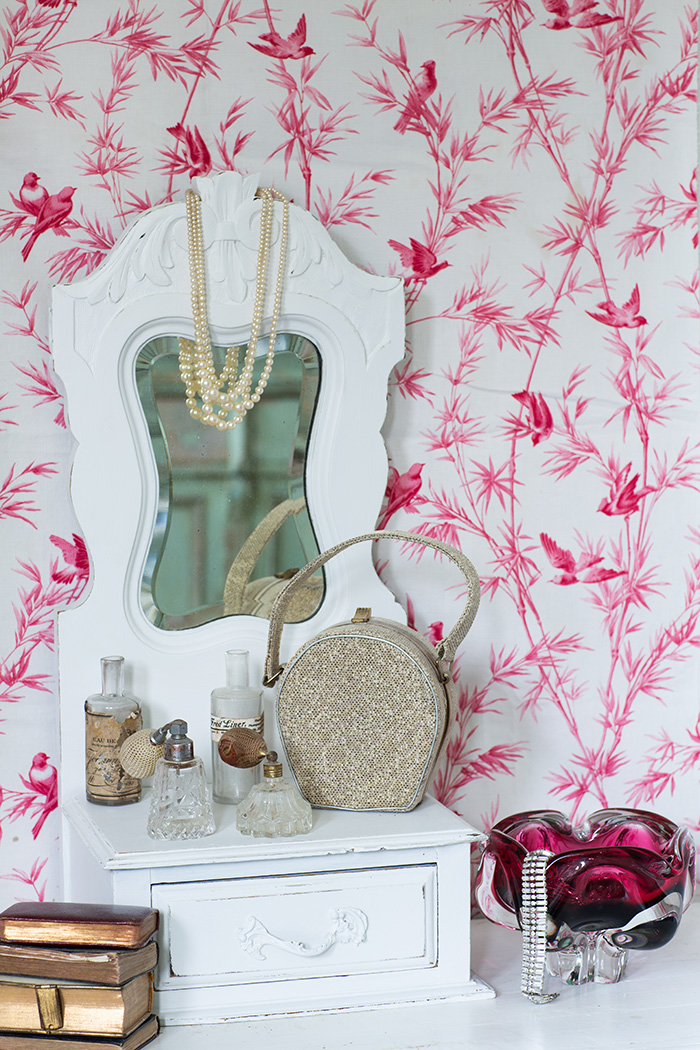
Create a vintage look with distressing
Our columnist and stylist Tamsyn Morgans gave this little dressing table mirror a makeover using Victorian Lace, a romantic off-white from Fusion Mineral Paint, followed by a very light distress on the edges using some soft sandpaper to create a timeworn look.
Distressing is ideal for a rustic country vibe and goes well with French brocante style too. As it’s a case of using sandpaper to create a faux look of wear and tear, it’s also great for a novice, as it doesn’t require precision skills.
‘If you’re distressing furniture, only distress edges, handles and corners,’ advises Karen Selby of The Upcycle Company. ‘If you’re using chalk paint, you can use a baby wipe to create a beach-wash effect by rubbing it over an entire piece, or use it for a clean distressing finish on the edges without the mess of sanding.’
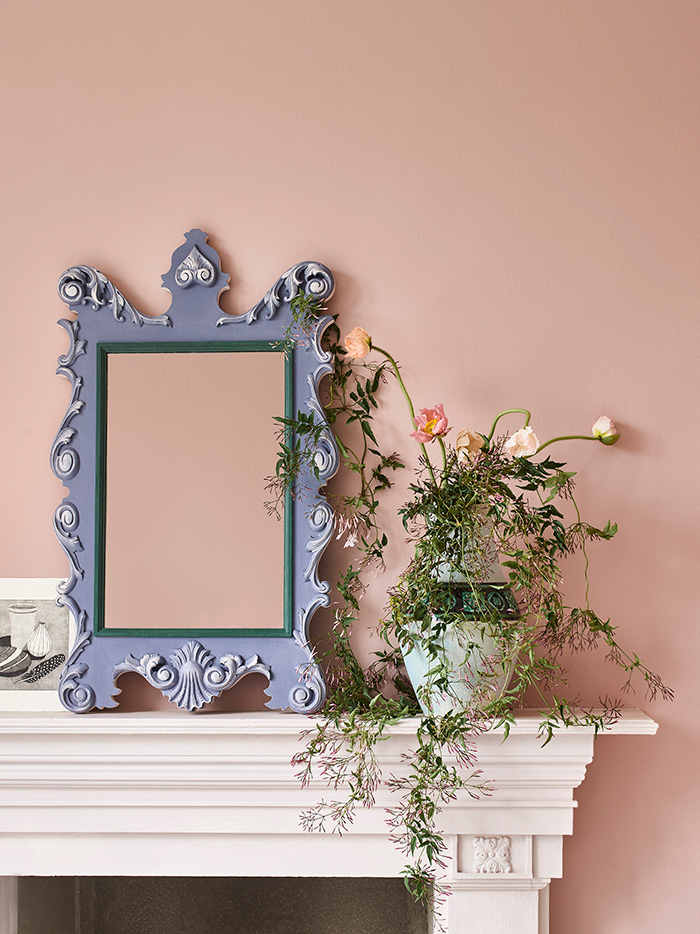
© Rachel Verney
Swap out legs
Uplift your furniture, in more ways than one, with a new set of legs – or even consider adding them if your piece doesn’t have any. This colourful upcycle was created by interiors influencer Rachel Verney from an old pine chest of drawers. She sawed off the old legs, sanded and primed the piece, before adding a scalloped decoration to the front and attaching antique-brass hairpin legs from Rothley.
‘Planning and preparation are key. Before you start, make certain that you have all the tools you need. I’ve lost count of the number of times I’ve been caught out mid-project when I couldn’t find something,’ says Rachel. ‘Don’t be afraid to try bold colours or quirky designs. The beauty of upcycling is that you can really stamp your own style on to a preloved item.’
faffdesigns.com
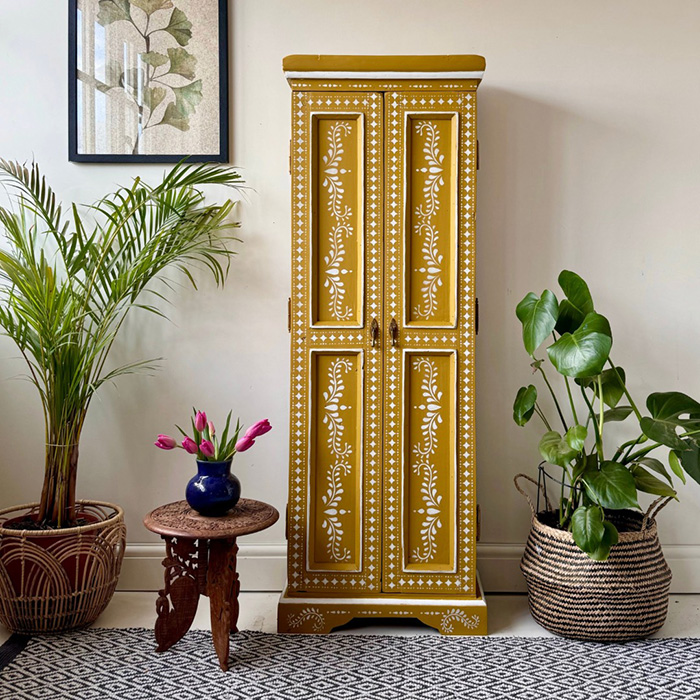
Add pattern with stencilling
Staffordshire-based upcycler Connie Clarke of Faff Designs has transformed this wardrobe using Yellowstone paint and a chic bone inlay stencil, both from Dixie Belle Paint Company. The result is a modern take on folk art with pretty patterns that are reminiscent of marriage chests. If you like the look, you can find excellent tutorials for this and other projects on Connie’s YouTube channel.
From Nicolette Tabram’s Moroccan-inspired designs to Dizzy Duck’s mid-century and art deco patterns, stencils have come a long way since the days of trailing vines. For professional results, apply a light layer of spray adhesive to the back of the stencil to avoid movement and the possibility of bleed-through, and keep your brush dry and paint thick to avoid runs.
© Marcie K
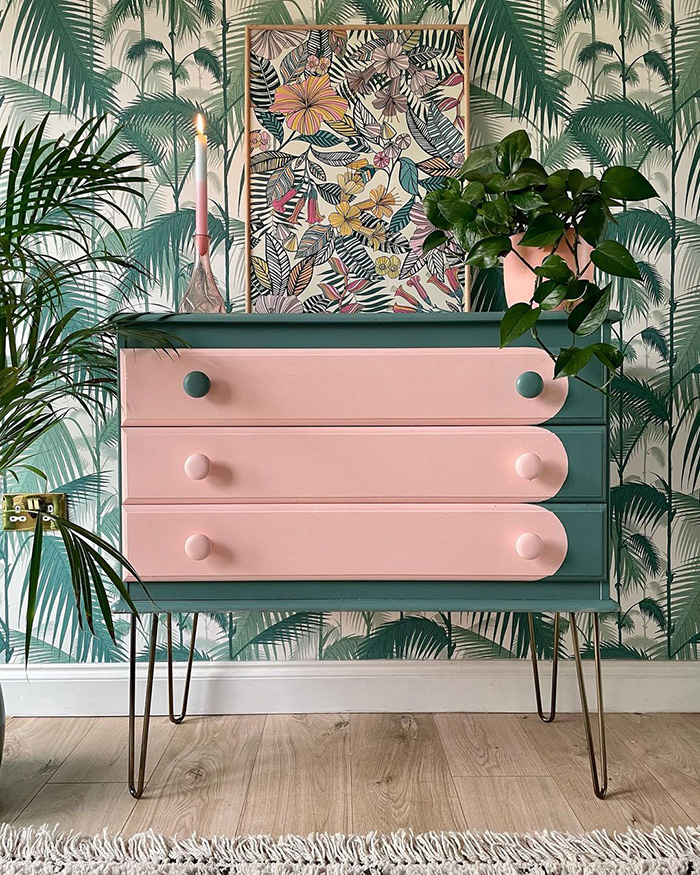
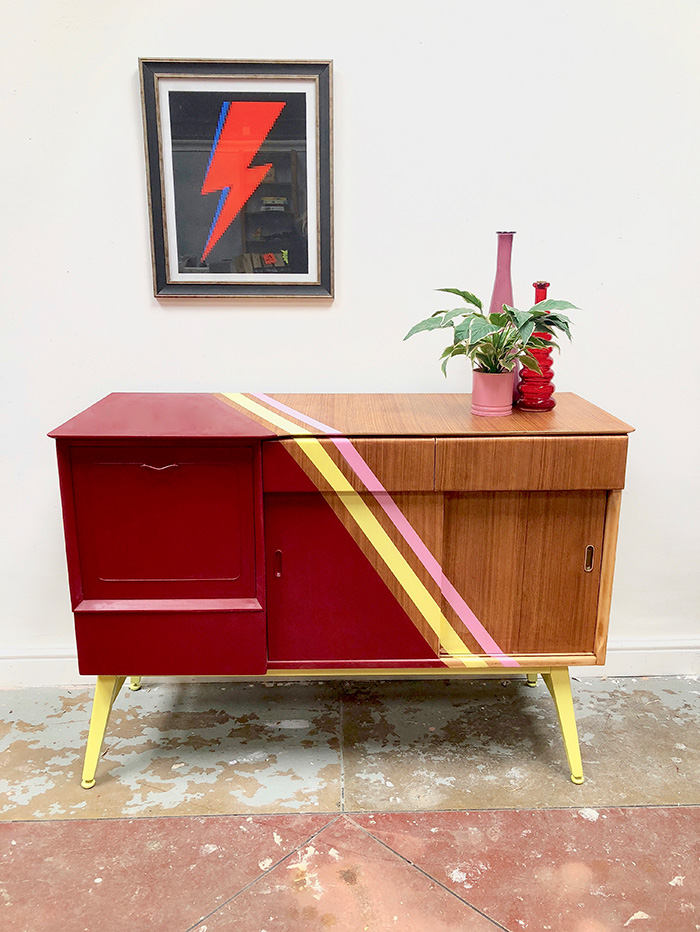
Go geometric
A graphic, contemporary look works well with the sleek uncluttered lines of mid-century furniture, and this sideboard, created by Reclaim’s columnist Marcie K, is no exception. She achieved this bold style with three shades of Molotow spray paint for a speedy makeover. Masking tape was used to create the stripes, while masking off the area of woodgrain with newspaper while she worked on the other sections.
When working with spray paint, technique is important to avoid drips. ‘Give the can a good shake then hold it about 10–15cm away from the surface,’ Marcie advises. ‘Start lightly spraying side to side, making sure you don’t stay in one place for too long. If drips occur, wipe them away with your finger (not a cloth) and respray.’
webbandgray.com
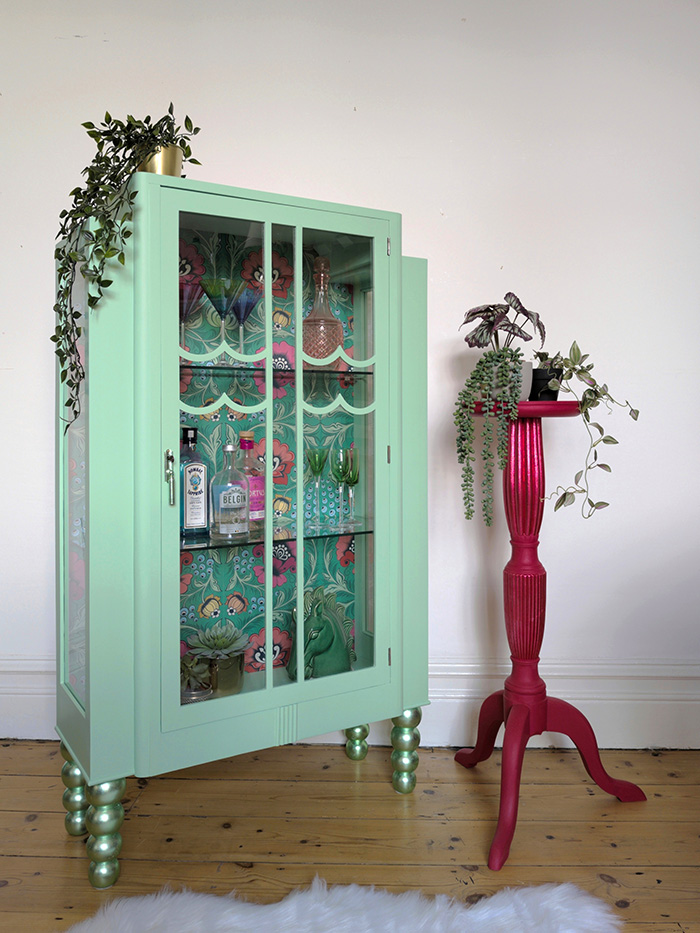
Lining with wallpaper
Reimagined by Webb & Gray, this display cabinet has been hand-painted then lined with folk floral Alice Green wallpaper by Olenka Design. ‘I love Peastachio No. 118 paint by Victory Colours because it’s light enough to feel fresh and pretty, but bold enough to make a statement,’ says Carrie Webb, one half of the creative duo behind the brand, who specialise in creating luxurious and sustainable furniture and homeware.
Unlike more traditional decoupage, where you may have the fiddly task of matching up a design on drawer fronts or cupboard doors, it’s easy to achieve a stunning result when lining the back of a cabinet with wallpaper. Especially when you get to show it off through glazed doors.
Before you go...
...fancy automatic entry to all future competitions?
Simply register online today for FREE and you will get:
Automatic entry to all current and future competitions.
Access to Reclaim Inspiration - an online visual pinboard for saving all your home and style inspiration.
A regular newsletter of inspiration, ideas and advice.
Save all your articles in one place
Become a Reclaim Member to save all your home and style inspiration. Simply login or register online today for FREE and you will get:
Automatic entry to all current and future competitions.
Access to Reclaim Inspiration - an online visual pinboard for saving all your home and style inspiration.
A regular newsletter of inspiration, ideas and advice.